

Operating a shore hardness tester accurately is crucial for obtaining reliable hardness measurements of various materials, especially elastomers, plastics, and rubbers. As a reputable shore hardness tester supplier, we understand the importance of providing clear guidance on how to use these instruments effectively. In this blog post, we will walk you through the step-by-step process of operating a shore hardness tester, ensuring that you can achieve precise and consistent results every time.
Understanding the Basics of Shore Hardness Testing
Before diving into the operation of a shore hardness tester, it's essential to understand the concept of shore hardness. Shore hardness is a measure of the resistance of a material to indentation. It is determined by pressing an indenter into the material under a specific force and measuring the depth of the indentation. The shore hardness scale ranges from 0 to 100, with higher values indicating harder materials.
There are several types of shore hardness scales, but the most commonly used are the Shore A and Shore D scales. The Shore A scale is typically used for softer materials such as rubber and elastomers, while the Shore D scale is used for harder materials such as plastics and rigid polymers.
Types of Shore Hardness Testers
As a shore hardness tester supplier, we offer a variety of testers to meet different testing requirements. Some of the common types of shore hardness testers include:
- Shore A Digital Hardness Tester: This type of tester uses a digital display to show the hardness value. It is easy to read and provides accurate measurements.
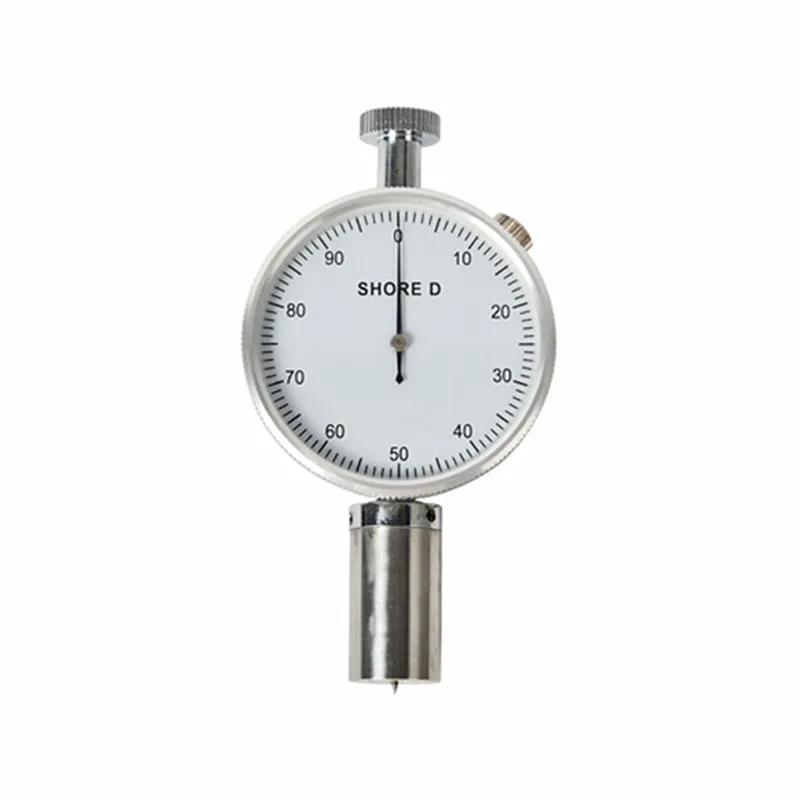
- Dial Shore Hardness Tester for Plastics: A dial shore hardness tester features a mechanical dial that indicates the hardness value. It is a traditional and reliable option for hardness testing.
- Shore D Digital Hardness Tester: Similar to the Shore A digital hardness tester, but designed for harder materials using the Shore D scale.
Step-by-Step Guide to Operating a Shore Hardness Tester
Step 1: Prepare the Test Specimen
- Size and Shape: Ensure that the test specimen has a flat and smooth surface. The minimum thickness of the specimen should be at least 6 mm (0.24 inches) for accurate results. If the specimen is too thin, the hardness measurement may be affected by the underlying surface.
- Clean the Surface: Clean the surface of the specimen to remove any dirt, dust, or contaminants. This will ensure that the indenter makes proper contact with the material.
Step 2: Select the Appropriate Scale
- Determine the Material Type: Based on the type of material you are testing, select the appropriate shore hardness scale. For example, use the Shore A scale for soft rubbers and the Shore D scale for hard plastics.
- Set the Tester: If your shore hardness tester has a switch or selector for different scales, set it to the appropriate scale before starting the test.
Step 3: Calibrate the Tester
- Regular Calibration: It is important to calibrate the shore hardness tester regularly to ensure accurate measurements. Follow the manufacturer's instructions for calibration. Typically, calibration involves using a calibration block with a known hardness value.
- Zero Adjustment: Before each test, make sure the tester reads zero when there is no pressure on the indenter. If necessary, adjust the zero setting according to the tester's manual.
Step 4: Perform the Hardness Test
- Position the Tester: Place the shore hardness tester vertically on the test specimen, ensuring that the indenter is perpendicular to the surface. Apply a steady and uniform pressure on the tester to bring the indenter into contact with the material.
- Apply Pressure: Apply the pressure gradually until the pressure foot of the tester is in full contact with the specimen. Do not apply excessive force or impact the specimen, as this can affect the accuracy of the measurement.
- Read the Hardness Value: Once the pressure foot is in full contact with the specimen, read the hardness value from the display or dial of the tester. For digital testers, the value will be shown on the screen. For dial testers, read the value at the pointer on the dial.
- Take Multiple Readings: To ensure accuracy, take at least three readings at different locations on the specimen. Calculate the average of these readings to obtain the final hardness value.
Step 5: Record and Analyze the Results
- Record the Data: Write down the hardness values obtained from each reading, along with the location on the specimen where the reading was taken. This will help you keep track of the test results and identify any variations in hardness across the specimen.
- Analyze the Results: Compare the average hardness value with the expected hardness range for the material. If the results are outside the expected range, it may indicate a problem with the material or the testing process.
Tips for Accurate Hardness Testing
- Temperature and Humidity: The temperature and humidity of the testing environment can affect the hardness of the material. Try to perform the test in a controlled environment with a stable temperature and humidity level.
- Indenter Maintenance: Keep the indenter of the shore hardness tester clean and free from damage. A worn or damaged indenter can lead to inaccurate measurements.
- Test Speed: Apply the pressure at a consistent speed to ensure accurate results. Rapid or uneven application of pressure can cause variations in the hardness measurement.
Conclusion
Operating a shore hardness tester is a relatively straightforward process, but it requires attention to detail and proper technique to obtain accurate results. By following the steps outlined in this blog post, you can ensure that you are using your shore hardness tester correctly and getting reliable hardness measurements.

As a leading shore hardness tester supplier, we are committed to providing high-quality products and excellent customer service. If you have any questions about our shore hardness testers or need further assistance with hardness testing, please do not hesitate to contact us. We are here to help you with your procurement needs and ensure that you find the right solution for your hardness testing requirements.
References
- ASTM D2240 - Standard Test Method for Rubber Property - Durometer Hardness
- ISO 868 - Plastics and ebonite - Determination of indentation hardness by means of a durometer (Shore hardness)