

Reading the results from a shore hardness tester is a crucial skill for anyone involved in materials testing, especially in industries such as plastics, rubbers, and elastomers. As a shore hardness tester supplier, I understand the importance of accurate hardness measurement and the significance of correctly interpreting the test results. In this blog post, I will guide you through the process of reading the results from a shore hardness tester, explain the different scales used, and provide some practical tips to ensure reliable measurements.
Understanding Shore Hardness Testing
Shore hardness testing is a widely used method for measuring the hardness of soft materials, including plastics, rubbers, and elastomers. The test involves applying a specific force to the material using a durometer, which is a device equipped with a spring-loaded indenter. The indenter is pressed into the material, and the depth of penetration is measured. The hardness value is then determined based on the amount of penetration, with higher values indicating a harder material.
There are several different scales used in shore hardness testing, each designed for specific types of materials. The most common scales are Shore A and Shore D. The Shore A scale is used for softer materials, such as rubbers and elastomers, while the Shore D scale is used for harder materials, such as rigid plastics. Other scales, such as Shore O, Shore OO, and Shore M, are used for specialized applications.
Reading the Results from a Shore Hardness Tester
Reading the results from a shore hardness tester is relatively straightforward, but it requires some basic knowledge of the testing process and the different scales used. Here are the steps to follow:
- Select the appropriate scale: Before testing, you need to determine which scale is appropriate for the material you are testing. As mentioned earlier, the Shore A scale is used for softer materials, while the Shore D scale is used for harder materials. If you are unsure which scale to use, consult the material specifications or seek advice from a materials testing expert.
- Prepare the sample: The sample should be clean, dry, and free of any surface defects or contaminants. It should also be thick enough to ensure that the indenter does not penetrate through the sample and reach the underlying surface. For most materials, a sample thickness of at least 6 mm is recommended.
- Apply the durometer: Place the durometer on the sample surface, making sure that the indenter is perpendicular to the surface. Apply a firm, steady pressure to the durometer until the indenter is fully seated in the material. Hold the durometer in place for a few seconds to allow the material to deform and reach a stable state.
- Read the hardness value: Once the material has reached a stable state, read the hardness value from the durometer scale. The hardness value is usually indicated by a pointer or a digital display. Make sure to read the value at the center of the scale, as the accuracy of the measurement may decrease towards the edges of the scale.
- Record the results: Record the hardness value along with the scale used, the sample type, and any other relevant information. It is also a good idea to take multiple measurements at different locations on the sample to ensure that the results are consistent.
Interpreting the Results
Interpreting the results from a shore hardness tester requires an understanding of the different scales and the properties of the materials being tested. Here are some general guidelines to help you interpret the results:
- Shore A scale: The Shore A scale ranges from 0 to 100, with lower values indicating a softer material and higher values indicating a harder material. Materials with a Shore A hardness of 0 to 10 are extremely soft and can be easily deformed by hand. Materials with a Shore A hardness of 10 to 30 are soft and flexible, while materials with a Shore A hardness of 30 to 60 are moderately soft and have some degree of elasticity. Materials with a Shore A hardness of 60 to 90 are hard and rigid, while materials with a Shore A hardness of 90 to 100 are very hard and brittle.
- Shore D scale: The Shore D scale ranges from 0 to 100, with lower values indicating a softer material and higher values indicating a harder material. Materials with a Shore D hardness of 0 to 20 are extremely soft and can be easily deformed by hand. Materials with a Shore D hardness of 20 to 40 are soft and flexible, while materials with a Shore D hardness of 40 to 60 are moderately soft and have some degree of elasticity. Materials with a Shore D hardness of 60 to 80 are hard and rigid, while materials with a Shore D hardness of 80 to 100 are very hard and brittle.
It is important to note that the hardness of a material can vary depending on a number of factors, including the temperature, humidity, and the rate of deformation. Therefore, it is recommended to test the material under standard conditions and to compare the results with the specifications provided by the material manufacturer.
Tips for Accurate Measurements
To ensure accurate and reliable measurements, here are some tips to keep in mind:

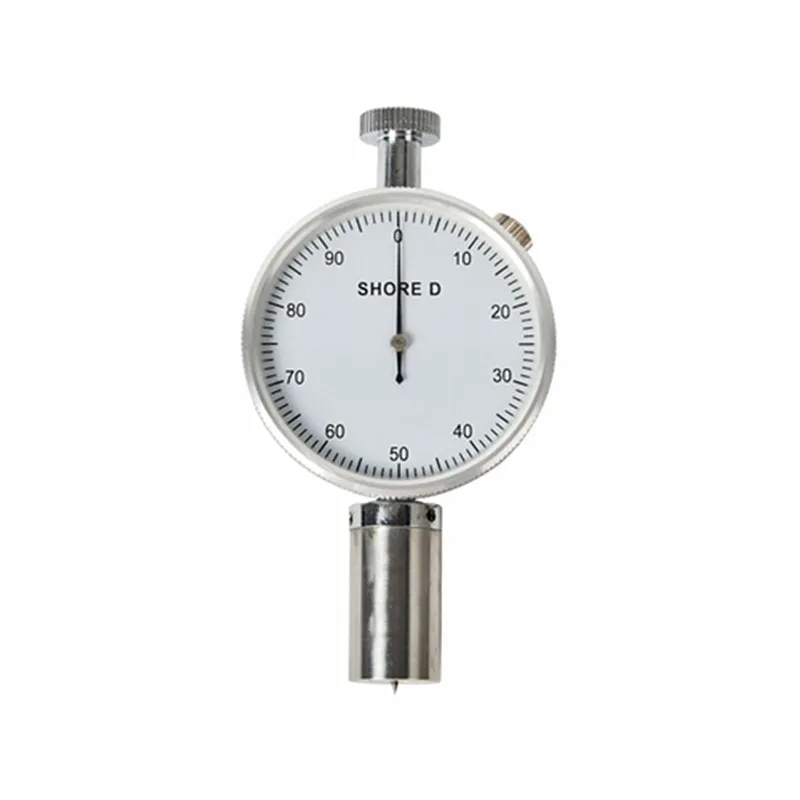
- Use a calibrated durometer: A calibrated durometer is essential for accurate measurements. Make sure to calibrate the durometer regularly according to the manufacturer's instructions.
- Test the material under standard conditions: The hardness of a material can vary depending on the temperature, humidity, and the rate of deformation. Therefore, it is recommended to test the material under standard conditions, such as at a temperature of 23°C and a relative humidity of 50%.
- Take multiple measurements: To ensure that the results are consistent, it is recommended to take multiple measurements at different locations on the sample. The average of these measurements should be used as the final hardness value.
- Use the correct indenter: Different types of materials require different types of indenters. Make sure to use the correct indenter for the material you are testing.
- Avoid overloading the sample: Applying too much pressure to the durometer can cause the indenter to penetrate too deeply into the material, resulting in inaccurate measurements. Make sure to apply a firm, steady pressure to the durometer without overloading the sample.
Conclusion
Reading the results from a shore hardness tester is a crucial skill for anyone involved in materials testing. By following the steps outlined in this blog post and using the tips provided, you can ensure accurate and reliable measurements of the hardness of soft materials, such as plastics, rubbers, and elastomers. If you have any questions or need further assistance with shore hardness testing, please do not hesitate to contact us. We are a leading shore hardness tester supplier, offering a wide range of Dial Shore Hardness Tester for Plastics, Shore D Digital Hardness Tester, and Dial Shore Hardness Tester for Rubbers. Our team of experts is always available to provide you with the support and guidance you need to make informed decisions about your materials testing needs.
References
- ASTM D2240 - Standard Test Method for Rubber Property - Durometer Hardness
- ISO 868 - Plastics and ebonite - Determination of indentation hardness by means of a durometer (Shore hardness)